



How to Set Up a Laptop for Better Posture: A Step-by-Step Guide
A practical, step-by-step guide to raising your laptop screen, positioning your keyboard and arranging your desk to ease neck and upper back strain.
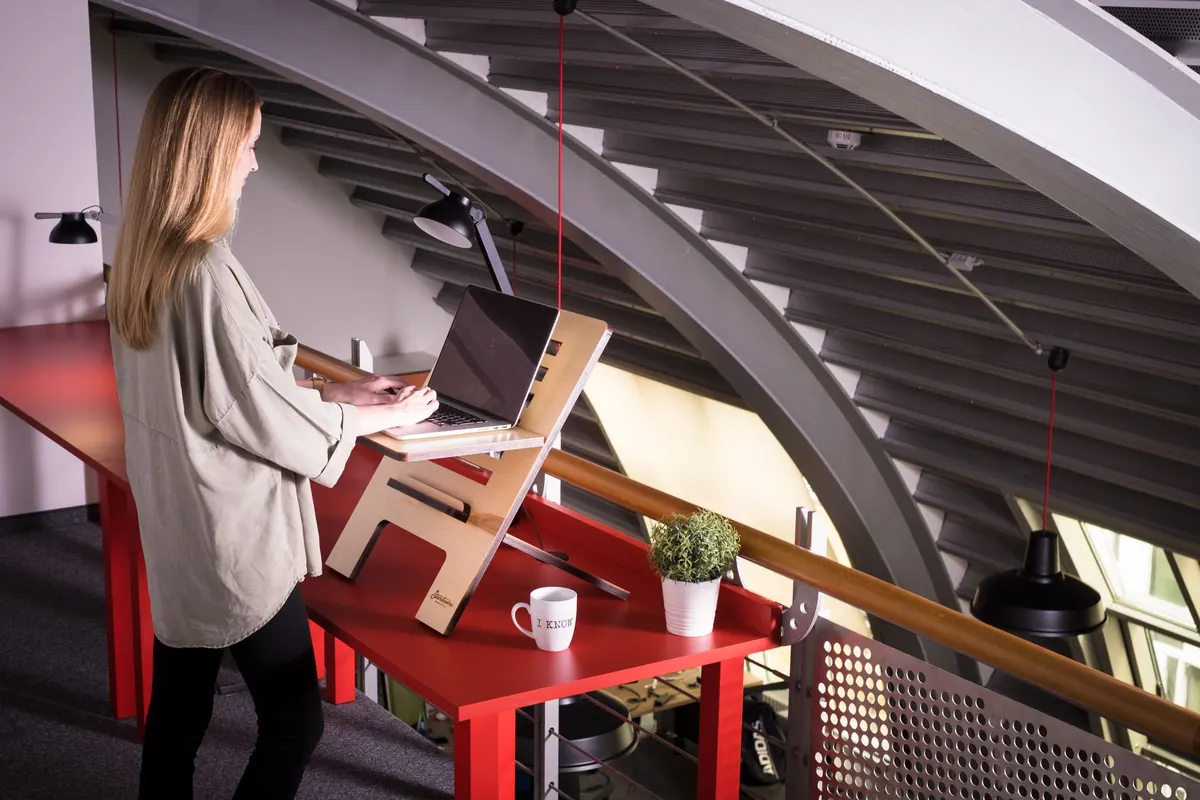
Laptops are built to be carried, not to be kind to your neck. The screen and the keyboard are joined together, so the moment you get one of them right, the other drifts out of place. You either peer down at the display or reach up to type, and your upper back quietly absorbs the difference.
The encouraging part is that a comfortable laptop setup rarely means buying new furniture. A stand, a separate keyboard and twenty minutes of rearranging will usually do more for your neck than any gadget. Work through the steps below in order and you will feel the difference the same day.
Why a laptop alone is rarely kind to your neck
Two things need to be true at once. Your eyes should sit level with the top third of the screen, so your head stays balanced over your shoulders rather than tipping forward. Your elbows should rest at roughly ninety degrees, with forearms level and wrists straight.
On a laptop, those two requirements are about a handspan apart. Raise the machine high enough for your neck and the keyboard ends up near your chest. Lower it to a sensible typing height and you spend the day looking down. You cannot fix both with the laptop alone, which is why almost every good setup involves separating the screen from the keyboard.
Before you move anything: get the chair right
Screen height is only meaningful relative to where you are sitting, so start with the seat. Set the height so your feet rest flat on the floor and your knees are level with, or slightly below, your hips. Slide back until your back is supported and there is a small gap of a couple of fingers behind your knees. If your desk is then too high, raise the chair and add a footrest rather than slouching to reach your keyboard.
Once the chair is settled, check your desk height with a quick test. Let your arms hang, then bend your elbows to about ninety degrees. Your hands should land at keyboard level without your shoulders lifting. If they do not, adjust the chair again before touching anything else.
Step 1 — Raise the screen to eye level
Now give the screen a boost. A laptop stand is the neat solution, but a stack of books, a ream of printer paper or a sturdy box does the same job. Aim for the top of the screen to sit at or just below eye level, so the top line of text is readable without tilting your head. A slight downward tilt of your gaze is fine; a bend in your neck is not.
How high, exactly?
Sit tall, look straight ahead, then lower your eyes a few degrees. That is where the middle of your screen should be. As a rough guide, the screen wants to be about an arm's length away — close enough to read comfortably, far enough that you are not leaning in. Tilt the screen back slightly, by around ten to twenty degrees, so it faces you rather than the ceiling.
If you use the laptop screen only
Sometimes a separate keyboard is not possible: on a train, in a shared office, on a site visit. In that case, raise the laptop as far as you comfortably can, tilt the screen to reduce glare, and accept that the setup is temporary. Keep sessions shorter, take more breaks, and reset properly when you are back at your usual desk.
Step 2 — Fix the keyboard and mouse position
An external keyboard is the single most useful change you can make. Bring it close, directly in front of the screen stand, with your elbows staying near your sides as you type. Wrists should be straight rather than bent upwards, and floating slightly rather than pinned to the desk edge. If you use a wrist rest, use it between bursts of typing — not as a support while your fingers are moving.
Then place the mouse on the same surface, close to the keyboard and at the same height. Reaching across a wide keyboard with a numpad on the right is a common cause of shoulder tension; a compact keyboard lets the mouse sit much nearer. If a mouse is awkward, a trackball or a vertical mouse may suit your hand better — try before committing.
Step 3 — Lay out the rest of the desk
Once the core setup is right, small layout changes keep you from twisting and reaching all day.
- Move anything you use often — mouse, phone, notepad, pen — inside a forearm's reach, so you are not swivelling to grab it.
- Put your phone on a stand or prop it up. Flat on the desk means looking down, repeatedly.
- Position a second screen at the same height and roughly the same distance, angled towards you and straight ahead where possible. If you use it mainly for reference, a slight offset is better than a constant twist.
- Move reference documents onto a stand or a raised folder beside the screen, rather than reading them flat on the desk.
- Check the light. Bright glare behind or in front of the screen makes you lean and squint; adjust the blind, move the lamp, and match screen brightness to the room.
Step 4 — Build movement into the day
No single posture is perfect for eight hours. Your body prefers changing position, so treat your new setup as a home base rather than a fixed cage. Stand up and walk for a minute or two at least once an hour, and shift between sitting tall, leaning back slightly and standing if you have a height-adjustable desk. Take calls standing up. Let your shoulders drop and roll them gently, and check in on whether your chin has crept forward.
A simple alarm on your phone, or a reminder on your calendar, is more reliable than good intentions. Five short breaks spread across the day beat one long stretch at lunch.
A five-minute setup checklist
- Feet flat on the floor, knees level with or below the hips, lower back supported.
- Elbows at about ninety degrees, forearms level, shoulders relaxed and low.
- Top of the screen at or just below eye level, roughly an arm's length away.
- Laptop raised on a stand or a stack of books, with a separate keyboard and mouse in front.
- Mouse beside the keyboard, not out to the side at arm's length.
- Everyday items within easy reach; nothing that needs a twist or a stretch.
- A reminder set to stand and move at least once an hour.
When to ask for help
Adjusting your setup eases the everyday ache that builds up from a cramped laptop, but it is not treatment. If neck or upper back pain lasts more than a couple of weeks, keeps waking you at night, or comes with numbness, tingling or weakness in your arms or hands, see your GP or a physiotherapist rather than working around it. In the UK, many employers also offer a workstation or display screen equipment assessment — it is worth asking your manager or HR, because a trained assessor will often spot things a checklist cannot. You can read more about looking after your spine elsewhere on Spine Haven, but for persistent symptoms, get individual advice.